Sunday, January 31, 2010

The Sea of Monsters

The Sea of Monsters (Percy Jackson and the Olympians, #2) The Sea of Monsters by Rick Riordan


My rating: 4 of 5 stars
Riordan provides us with another great adventure and a great twist at the end.

I liked this one better than the first and can only hope the series continues this trend.

View all my reviews >>

The Lightning Thief

The Lightning Thief (Percy Jackson and the Olympians, #1) The Lightning Thief by Rick Riordan


My rating: 3 of 5 stars
I really enjoyed the Greek mythology weaved into this book. I never really put much effort into learning about the Greek gods, so it's nice learning about them a little through the series.

This book has a lot of action and a lot of potential to be a good movie. Let's hope Hollywood doesn't disappoint.

While I don't mind, some families may be concerned that this book depicts Greek gods, as well, gods. I can already hear the arguments that it's paganism, blasphemy, etc. I don't think kids rushed out to become ordained witches and warlocks after the Harry Potter series, so I think we're ok here.

Some say the series reminds them a lot of Harry Potter. Unfortunately, I think a lot of young adult fantasy is going to be compared to Harry Potter. To me, the series are only similar in the sense that there is a middle school boy who discovers he's special and needs to fight evil. Of course every middle school boy has to have friends to help complete the task.

View all my reviews >>

Carrot Muffins with Cream Cheese


I absolutely love carrot cake! And what's the best type of icing for carrot cake? Cream cheese of course? When I ran across this recipe on Joelen's Culinary Adventures, I knew I had to give it a try. It was definitely easier than making a carrot cake (I think because I used my Ninja to chopped the carrots).

If you're going to give this recipe a try, I have a couple of comments. My cream cheese middle fell almost to the bottom. I used reduced fat cream cheese, which may be part of the problem, but I'm not sure. Do not try to mix things up and put the cream cheese between layers of batter (just plop it on top). I tried this for some, and the cheese definitely fell all the way to the bottom.

Also, I'd line the muffin pan with baking cups. With my left over batter I thought I'd make a couple mini-loaves. I sprayed the pan with baking spray, but this is what they looked like after I was able to pry them out of the pan.

Recipe adapted from The Delicious Life (with help from Joelen's blog, linked above)

INGREDIENTS:

Carrot Muffins:
3/4 cup all purpose flour
3/4 cup white whole wheat flour (I had some on hand and figured I'd give it a try. I definitely couldn't tell there was wheat flour.)
1 1/2 teaspoon baking soda
1 teaspoon baking powder
1/2 teaspoon salt
1 teaspoon cinnamon (heaping)
1/2 teaspoon nutmeg
1 cup sugar
3 eggs
2/3 cup vegetable oil (would have used apple sauce if my hadn't gone bad)
1 1/2 cup shredded carrots (about 8oz of baby carrots)
1/2 cup chopped walnuts (optional)
1/2 cup raisins, soaked in hot water or rum for 10 minutes (optional)

Cream Cheese Filling:
4 oz. cream cheese, softened
1 egg yolk
1/2 cup sugar
1/2 teaspoon vanilla

DIRECTIONS

Preheat oven to 350. Place liners in your muffin tins.

Sift together the flour, baking soda, baking powder, salt, cinnamon, nutmeg and sugar; set aside. (Confession, I never sift!)

In separate bowl, beat the eggs and oil together until lightened. Stir in the carrots, walnuts and raisins.

In another bowl, cream together the cream cheese filling ingredients; set aside.

Fold the dry muffin ingredients into the wet egg/oil mixture and stir until just combined.

Fill each muffin cup about ¾ full. Top each filled muffin cup with a generous teaspoon of the cream cheese filling.

Bake about 20-25 minutes*, or until a toothpick inserted into the cake part comes out clean.

Makes about 18 muffins.

*If making standard sized muffins, bake for 17-20 minutes.
*If making jumbo sized muffins, bake for 23-25 minutes.

Spanakopita!


A couple of years ago I surprised my taste buds with spanakopita. See, I never really liked spinach, so I was surprised when I liked this dish. I had some leftover phyllo getting ready to bad, so I figured I'd try making some spanakopita myself. I've learned I love the taste of phyllo, but not the tedious task of working with it. I'm going to leave making spanakopita up to the Greeks.

Recipe adapted from All Recipes. I put some phyllo in the middle, but the picture doesn't really show it. I feel like the filling is missing a little something--mostly a spice. After I sprinkled some salt and pepper it definitely tasted better. As you can imagine, with a layer of phyllo dough on top, it's hard to get salt and pepper into the filling, so be sure you do it while mixing the filling. It can also get soggy, so be sure you drain the spinach, and then again try draining the filling.

Oh, also, I knew I couldn't eat all of this at once, so I used two bread loaf pans--baked one, put the other unbaked in the freezer.


INGREDIENTS

* 3 tablespoons olive oil
* 1 large onion, chopped
* 1 bunch green onions, chopped
* 2 cloves garlic, minced
* 2 pounds spinach, rinsed and chopped (I used baby spinach so I didn't have to destem it.)
* 1 cup chopped fresh parsley
* 2 eggs, lightly beaten
* 3/4 cup ricotta cheese
* 1 1/2 cup crumbled feta cheese
* 1 bundle of phyllo dough (the packages they sell in the store come with two bundles)
* 1/4 cup olive oil (to coat phyllo, I used melted butter)
* 1 tsp salt
* pepper to taste

Directions

1. Preheat oven to 350 degrees F (175 degrees C). Lightly oil a 9x9 inch square baking pan. (I used 2 baking loaves)
2. Heat 3 tablespoons olive oil in a large skillet over medium heat. Saute onion, green onions and garlic, until soft and lightly browned. Stir in spinach and parsley (and salt and pepper), and continue to saute until spinach is limp, about 2 minutes. Remove from heat and set aside to cool. DRAIN!
3. In a medium bowl, mix together eggs, ricotta, and feta. Stir in spinach mixture. Lay 1 sheet of phyllo dough in prepared baking pan, and brush lightly with olive oil (or butter). Lay another sheet of phyllo dough on top, brush with olive oil, and repeat process with two more sheets of phyllo. The sheets will overlap the pan. Spread 1/2 spinach and cheese mixture into pan and put another 4-6 layers of phyllo (brush with butter, as before). Spread remaining spinach mixture and fold any overhanging dough over filling. Brush with oil, then layer remaining 4-8 sheets of phyllo dough, brushing each with oil (I only did 4 and wish I had a thicker crust on top). Tuck overhanging dough into pan to seal filling.
4. Bake in preheated oven for 30 to 40 minutes, until golden brown. Cut into squares and serve while hot.

Friday, January 29, 2010

In The Woods

In the Woods In the Woods by Tana French


My rating: 4 of 5 stars
I think I'd really give it 3.5 stars, but in the fashion of feeling generous, I'll go with the four instead of 3.

Unfortunately I didn't finish this in time to discuss with my online book club (I blame The Help being due at the library and since I couldn't renew it, I HAD to read it), but I digress and this should be a review for French's work.

I haven't read a mystery in quite some time and I admit, it was nice to have a change of pace in genre.

I wasn't on the edge of seat throughout the book, and the ending didn't completely take me by surprise, but it all fit together well. I truly enjoyed the characters, mostly because I think they're a little flawed like society.

I'll eventually pick up the second in the series.

View all my reviews >>

More Clip Masks with Texture, Tulip, and Rhebs

If you're not from Baltimore, it's unlikely you've heard of Rhebs candy. Oh my goodness, are they delicious! My favorite are the chocolate truffles. This picture is from some time last year, and I so wish I had some of those truffles right now.

I'm not a digital scrapbooker, but these tutorials are helping to show me how easy it is. I might just have to convert, but that's after I use all of my current supplies for paper scrapbooking, of course.

If you can't tell from my blog, I like purple.

Here's the tutorial I followed.

Here's the texture I used.

Original Photo

Editing Fun

Clip Masks

One of my new year's resolutions was to improve my photography. While I know I need to get my butt out of the house and take pictures, I've determined I want to learn photoshop elements while it's cold. I had PSE6, but I figured if I'm going to put the time into learning PSE, I might as well learn on the most recent edition, so I asked for PSE 8 for an early birthday present (thanks mom!).

In order to learn how to use PSE, I'm going through online tutorials. I followed
this tutorial on clip masks with a photo of my parents' dog. I had so much fun, I figured I'd see if I can make it into a little image. I think I might actually be starting to learn a little bit about PSE. I have to make sure I don't overwhelm myself with too much at once though. I'd love to get rid of those green eyes, but I don't know how yet--perhaps that's a tutorial I'll eventually discover.

Blue


I subscribe to a weekly photography newsletter. I saw in the newsletter a blurb about a weekend photo challenge of "blue." So, I picked up camera and looked around my office to see what was blue. Lo and behold, the challenge was for a prior weekend and it was a link to the photos submitted. Oh well.

Since I took the time to take the darn picture, I'm posting it. It's nothing beautiful or breath taking.

Fix It Friday - 42


This week's photo challenge on I Heart Faces was texture. The blog encouraged we use texture in our edit this week. I played around with it briefly, but I kept coming back to the simplicity and beauty of the snow as a background. So, no texture for me this week.

I'm still learning how to optimize Photoshop Elements and for this edit, I basically followed Pioneer Woman's tutorial

Before:

My Edit:

Thursday, January 28, 2010

The Year of Living Biblically

The Year of Living Biblically: One Man's Humble Quest to Follow the Bible As Literally As Possible The Year of Living Biblically: One Man's Humble Quest to Follow the Bible As Literally As Possible by A.J. Jacobs


My rating: 4 of 5 stars
Long story short, the author is agnostic Jew and tries to live the Bible literally for a year.

For at least the past year, I've been experiencing a faith crisis. I wouldn't go so far to say I'm agnostic, but I'm not as in tune with my Christianity as I once was. I'd like to say this book spoke to me on a spiritual level and brought me back to my faith life, but I won't go that far.

I really enjoyed listening to the book for several reasons. Jacobs respectfully explored reasoning behind some Biblical traditions, stepped out of his comfort zone to explore religious traditions, and consulted with his "faith counsel" for guidance, among other things. He never says to the reader, "you should be this religion, or that," or "you're a sinner because you're not doing this," etc.

Throughout his journey Jacobs comes to understand the peace of ritual and the joys prayer can bring. He doesn't hold back telling us when he doesn't really want to perform a task, but accepts it and then respectfully tells us whether it was worth it or not.

I realize I'm starting to babel, so I should stop. Overall, for a girl who's a little lost in her faith, it was nice listening to this man's Biblical journey.

View all my reviews >>

Beef Brisket


OMG, I need to mark Monday down on the calendar. It's the first time EVER Joe liked a new recipe more than I did. This was my first time making brisket. Overall, I enjoyed it. I think I would have liked it a little more tender--perhaps cooking for only 8 hours instead of 10? Either way, it was a hit and easy to make. I rubbed the spices on the night before and then just stuck it in the crock pot in the morning. It's so nice coming home to the smell of dinner cooking.

Recipe adapted from allrecipes.

INGREDIENTS

1 tablespoon dried thyme leaves
1 tablespoon paprika
2 teaspoons freshly ground black pepper
2 teaspoons salt
1 teaspoon onion powder
1/2 teaspoon garlic powder
1/2 teaspoon cayenne pepper
1/2 teaspoon ground cumin
1/2 teaspoon liquid smoke flavoring

3 pounds beef brisket, trimmed of fat
2 tablespoons Worcestershire sauce
1 1/2 cups barbeque sauce (We used Famous Dave's)

DIRECTIONS
1. Combine thyme, paprika, pepper, salt, onion powder, garlic powder, cayenne, and cumin in a small bowl; set aside. Rub brisket all over with liquid smoke, then rub with spice mixture. (I did this the night before)

2. Pour Worcestershire and barbeque sauces into a slow cooker; place beef on top. Cover, and cook on LOW 8 to 10 hours, until fork tender.

Time for a Phone Upgrade

So it's time for my new every two. Right now I have the original LG enV. I really love the qwerty keyboard, so I know I want that for sure.

Here's the thing--there's all of this hype over the smart phones and I need you to convince me why I NEED one. I'll be a resident physician and it'll be nice to have an electronic version of drug programs to look up doses, but really, everything is in my Harriet Lane (basically the pediatrician's bible).

Right now, if I get a smartphone I see myself solely using it to waste time on facebook, email, etc. I can't fathom an extra $400 a year for those purposes alone. I'd much much rather use that towards massages or manicures or pedicures--you get the point.

My gut for the past three weeks has been telling me to get another cell phone with a qwerty keyboard and if I decide I want a handheld, perhaps ask for the iTouch as a gift.

So, if you think I need a smart phone, please try to convince me why. Also, if you you're in the know with when Verizon releases their new phones and if I should hold off, let me know that too please :-)

14 Days

I recently looked at the bottom of my iTunes playlist and this is what I saw:
I really don't think I'll ever sit for 14.7 days to just listen to my playlist. I have about 7 audiobooks burned on my hard drive, so that's a lot of the "songs," but still... No astounding point to make here, other than I was in awe when I saw that number.

Monday, January 25, 2010

I heart faces challenge - texture

Love my hubby!

Sunday, January 24, 2010

American Wife

American Wife American Wife by Curtis Sittenfeld


My rating: 2 of 5 stars
Please note, I do not give two stars to the narrator. The narrator did a wonderful job, it was the book itself I didn't like.

Sittenfeld uses Laura Bush as the inspiration for the narrator of American Wife. The difficulty is, I don't know what's fact and what's not. If I wanted to read a memoir by Laura Bush or a biography about Laura Bush, that's what I would have picked up.

Throughout the novel I kept thinking to myself, "What's Sittenfeld's political objective with this?" There were times when I thought she was trying to use the main character, Alice, to justify Bush's character, and then others where even Alice doesn't understand why Bush's character does things. I just don't know.

The main character has a controversial medical procedure which I feel was too much of the book. I found myself thinking, just get to the end all ready.

If this book didn't use Laura and George Bush as inspiration, I think it could have been a pretty darn decent novel about a woman learning about herself while struggling with the realities of marriage. However, I couldn't tell fact from fiction and it frustrated the buggers out of me.

View all my reviews >>

Penne a la Betsy


After hearing raves and raves about Pioneer Woman's Penne a la Betsy I figured it was time to give it a try. It was good, don't get me wrong, but I think I had my expectations a little too high. It was a little too rich for me, so next time I'll definitely use half and half instead of heavy cream. I also think I'd love it with a drained can of diced tomatoes. I didn't have any on hand, but I added the two small tomatoes I did have. I also agree with my friend Dani to up the salt. I used precooked shrimp, which was fine, but next time I'll look them myself, just to make it a little more "fresh."

Recipe Adapted from Pioneer Woman

INGREDIENTS

* ¾ pounds Penne Pasta (it comes in 1 pound boxes and I think it would still be enough sauce if you used the whole box)
* 1 pound Shrimp
* 3 Tablespoons Butter
* 3 Tablespoons Olive Oil
* 1 whole Onion (small) (yay for using my Ninja to mince it =) )
* 2 cloves Garlic
* ½ cups White Wine (or To Taste)
* 1 can Tomato Sauce (8 Oz)
* 1 cup Heavy Cream
* Fresh Parsley, to taste (only had dried, use 1 tsp)
* Fresh Basil - to taste (didn't have any, used 3/4 tsp of Italian Seasoning)
* Salt to taste - (at least a tsp)
* Pepper to taste
***My addition - 1 can of dice tomatoes, drained.

DIRECTIONS

Cook the penne pasta until tender-firm, also known as al dente.

Peel, devein and rinse (under cool water) 1 pound of large shrimp. Heat about 1 tbsp. butter and olive oil in a skillet. Add the shrimp and cook for a couple minutes until just opaque. Do not overcook them. Remove from heat and let cool for a few minutes. Now, put the cooked shrimp on the cutting board and pull off the tails. Chop the shrimp into bite –sized pieces and set aside.

Finely dice one small onion. Mince two cloves of garlic.

In a large skillet heat 2 tablespoons of butter and 2 tablespoons olive oil. Add the garlic and onion and sauté, stirring occasionally. After the garlic and onions have cooked a bit add your white wine. Let the wine evaporate for a few minutes, stirring occasionally. If you would rather not use wine, you can use low-sodium chicken broth instead (about ½ cup).

Now add an 8-ounce can of plain tomato sauce. Stir well until combined. Then add 1 cup of heavy cream. Continue stirring. (Add diced tomatoes if you're using them). Add seasonings. Turn heat down to low and let simmer.

Now add your chopped shrimp back into the tomato cream sauce. Give it a stir and add salt and pepper to taste. Finally add your cooked penne pasta and give it a good stir.

Saturday, January 23, 2010

The Help

The Help The Help by Kathryn Stockett


My rating: 5 of 5 stars
I almost didn't finish this book because it was due at the library today and I still had 300 pages to read. It'll only end up being a day late, and it was definitely worth the fine!

Stockett uses the narratives of two colored maids and a white woman living in the 1960's to tell the stories of "the help." Each character is written in her own dialect and at first I found it slightly difficult to follow at times, but then I heard each character's voice in my head, and it all fell into place.

It's no secret America suffered from narrow minds and segregation. I am fortunate enough to be born after the Civil Rights Movement, but Stockett took me back to the 1960's and helped me get a glimpse at what it could have been like for individuals of the time. (I say could, because no one ever knows for sure what it is like to walk in someone else's shoes). Every neighborhood has an outspoken/opinionated leader, someone who doesn't fit in, someone who appears crazy on the outside, someone silently suffering, and the list could go on. Stockett portrayed each and every one of these characters to a degree where I felt I was sitting in the room sharing iced tea with them.

I would love to say that the America of 2010 has left behind the closed-mindedness of segregation, but it hasn't. Yes, African Americans are no longer required to shop at separate grocery stores or go to "colored hospitals," but Americans continue to fight for civil rights. I hope that readers of The Help not only gain an appreciation for how times have changed, but recognize how much America still has yet to accomplish.

I'm ashamed to admit I don't remember much from Uncle Tom's Cabin, other than I read it in high school and it portrayed an colored family, but The Help is the next Uncle Tom's Cabin. Every high schooler should be required to read it! (and then make their parents read it too!)

View all my reviews >>

Friday, January 22, 2010

Adding Book Reviews

In an effort to win free books on Goodreads, I generally review every book I read. I've recently discovered it's super easy to paste that review here too. Since reading is such a large part of my life, I'm going to update my book reviews here as well. The reviews aren't great, mostly just a couple random thoughts on a book.

Now, since I've spent most of my Friday night blogging, I'm off to lay in bed with Joe. In true Amanda and Joe fashion, he'll be watching TV as I read. Loving the married life!

An Echo in the Bone

An Echo in the Bone (Outlander, #7) An Echo in the Bone by Diana Gabaldon


My rating: 4 of 5 stars
Really Gabaldon, you couldn't end with just a little more about Roger and Bree?

Once again, a fabulous and fabulously daunting novel.

I'm not a big fan of Revolutionary history, but of course, Gabaldon did a wonderful job using it as the backdrop of the story.

I can't wait for number 8 and to see where she takes the story now!

View all my reviews >>

Poppy Daydream Tutorial

I've realized the only way I'm really going to learn better editing and fun stuff in Photoshop Elements is to do tutorials. And hence I followed I heart Faces' Poppy Daydream Tutorial on this exciting Friday night. (Joe did offer to take me to the movies, but we need to save money, so I chose the internet instead). The tutorial is actually for photoshop, so I had to skip or improvise some steps. Either way, I'm definitely learning.

I think it's sad to say that before tonight I never knew what screen and soften light layers were. Shaking my head, I know. AND before tonight, I never used veils or added textures to photos. Man, you can do so much in photoshop (elements)! So these posts could be boring, but oh well. As long as time allows, I'll probably keep doing these tutorials and post my before's and after's.

To those who create the tutorials, thank you!

Left, before. Right, after.

Fun, eh?

Fix It Friday - 41


Sadly, the father of this family has terminal cancer, which made it more essential to include mom and dad in the background.

Here's the original:


And here's my edit:


Other than a crop, slight rotation, and using the threshold to adjust levels, I didn't make any other changes.

Blueberry Buttermilk Pancakes

I'm not going to lie, I have pancake envy. No matter how hard I try, my pancakes are never circles, they're always ovals. Sigh.

This week hubsters and I decided to have breakfast as dinner. I love those nights. I really wanted some blueberry pancakes, but hubsters wanted waffles. I ended up using the same batter for both and just added blueberries to my pancakes. Worked out perfectly. I was too hungry to take a photo, but I think y'all know what pancakes look like :p

Recipe from Joelen's Culinary Adventures (who happens to have a wonderful picture of her blueberry pancakes if you really want a picture).

INGREDIENTS

2 cups all purpose flour
2 tablespoons sugar
1/2 teaspoon salt
1 teaspoon baking powder
1/2 teaspoon baking soda
2 cups buttermilk
1/4 cup sour cream (I used light)
2 large eggs
3 tablespoons butter, melted and slightly cooled
1 cup frozen or fresh blueberries
1-2 teaspoons vegetable oil

DIRECTIONS

In a medium bowl, combine all the dry ingredients (flour, sugar, sugar, salt, baking powder and baking soda). Use a whisk to blend together. In a 4 cup measuring cup or another medium bowl, combine the remaining ingredients except the blueberries and vegetable oil (buttermilk, sour cream, eggs and melted butter) with a whisk. Make a well in the center of the dry ingredients and pour in the wet ingredients. Stir the wet mixture in gently with the dry ingredients just until it starts to fully combine. The batter will be a bit lumpy. If you see streaks of flour, it's okay, but just don't overmix! Let the lumpy batter sit aside for about 10 minutes before you start cooking.

To prepare for cooking, use a 10- or 12- inch nonstick skillet and heat 1 teaspoon of oil or spray with cooking spray.

Heat a 12-inch nonstick skillet over medium heat and spray with cooking spray enough to coat the bottom. Once the pan gets hot, carefully wipe some off the cooking spray from the pan with a paper towel. (I didn't do that, hmmm). Pour your batter on the skillet. Top the pancakes with a sprinkle of blueberries once you pour them into the pan.

Cook the pancakes until the edges start to bubble, which means it's starting to set. Take a peek at the bottom of the pancake to see if it's golden brown and that the pancakes start to form bubbles that break on the top of the pancake. At this point, you can flip the pancakes with a spatula. Continue to cook the second side until golden brown.

Serve the pancakes immediately or to keep warm, transfer them onto a wire rack set in a 200 degree oven

Camera Metering Modes

In order for cameras to tell how much light is available, they use a light meter. I came across this article on metering and realized I need to give it at try.

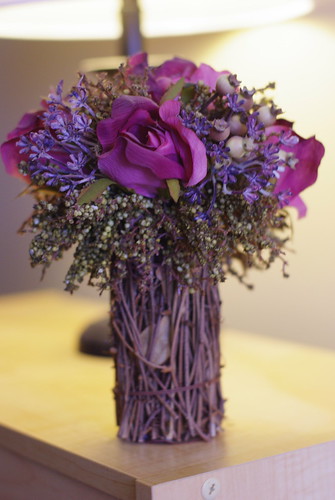
Again, more flowers.

Since I just learned the importance of white balance, before I tried metering, I wanted to balance my light.

Left is auto balanced, right is manual. I think the flower colors are more true in the right.

Now onto metering. It probably is easiest to see the difference when side by side, so I'll do that again.

Left: 16 points to measure the light. Middle: spot metering Right: Center Weighted
It's a subtle but noticeable difference.

Thursday, January 21, 2010

Week 3 - White Balance

Ahh, wondering where week 2 went? No fear, I completed the lesson and understood shutter, I was just too lazy to posts my pictures.

So that brings us to this week's lesson - white balance. This is a very sore topic for me because I feel that our wedding portraits had horrible white balance. That's neither here nor there, though.

If you're following along, or if you're new and you'd like to know what lessons I'm talking about, you can find them here.

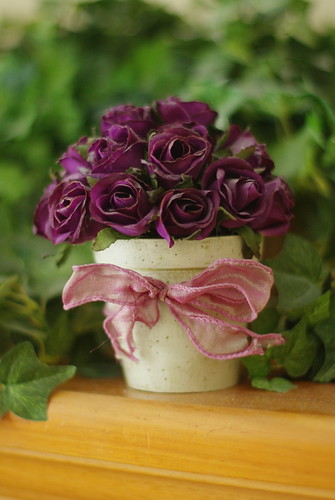
A dear friend once said she hopes I find something other than flowers to use to take pictures. I love my flowers and don't find Joe's video games nearly as exciting, so flowers it is.

Once again, these are straight out of the camera (SOOC) for my learning benefit. Aperture priority is my favorite, so that's what I used. Yes, I know some of the are out of focus, but I had to use a low f-stop to get enough light in. Sometimes it still wasn't enough light I had a camera shake. I could pull out a tripod, but that's too much work for this lesson.

This is auto white balance - aka the camera chose what to use.

Daylight setting

Tungsten setting. Way too blue!

Fluorescent setting.

Manual balance--meaning I held up a white piece of paper to manually set my white balance.

In order for me to truly see the difference between auto and manual, I need to see them side by side.

Left is auto white balance and right is manual. Seeing them side to side, I can definitely tell a difference and think the right is more true to the actual colors. I received a white balance card for Christmas, so I'll to play around with that too.

Wednesday, January 20, 2010

Radiology's Not for Me Either

Right now I'm doing a radiology elective.

While I knew radiology wasn't for me, this rotation has confirmed it. It's not that I don't like looking at the x-rays and scans, but I can't stand only seeing the pictures. I want to meet the patients and get the story. I want to know if your skull fractures are due to a motor vehicle accident or domestic violence. I want to know where you have arm numbness and what makes it better or worse. Heck, I want to meet the patient and not just see a picture of the patient.

So, radiologists, thank you. Someone has to do it and I'm glad it's not me.

Knee Update

Since it's been a while since the last knee update, I figured I'd catch my imaginary readers up to speed.

I'd love to say that my knee is completely back to normal, but unfortunately that's not the case.

I was a very bad patient the month of December and slacked off on my knee physical therapy exercises--but I was feeling fine. After the holidays and being back in Omaha, I wanted to get back to a normal workout routine. Since I hadn't really been having knee pain, I decided to start Wii's EA active and stopped doing my knee routine. Yes, I still did some exercises here and there, but not the full workout.

Sigh. It seems my knee isn't ready for me to do EA active. I'm not sure if it was the running in place, jumps, or just doing other exercises that caused my knee to start hurting again. It was mostly an ache. It didn't get worse with exercises, but it didn't get better with rest either.

This week I decided I need to leave EA active behind and go back to my knee physical therapy routine. I want to do some more cardio in there too, so I won't make my knee routine my only type of workout.

Good news. Since going back to my knee routine this week and avoid EA active, I haven't really had any pain. As a bonus--I did thirty minutes of the elliptical without pain today! Seven months ago that would have been unheard of. So, yes, I'm making progress, but I'm still a little bummed I don't have a completely normal knee yet. I still take one naprosyn almost daily though. Sometimes it's for pain, but most of the time I think it's for NSAID withdrawal headaches. Yeah. I need to work on that.

Not the Only One with Babies on the Brain

Two weeks ago I bought some maternity clothes because they were dirt cheap. This week, Joe emailed me some links to onesies he found. I asked Joe if was going to buy them, "nah, I'll wait until we're actually pregnant." Good thing I have gmail and can store emails for forever.

Now to share some of his finds :-)


And of course, we have to throw some Star Wars in there!


I'd love to include links to each onesies, but I discovered Joe only sent me links to the photos, not where we could buy them.

Tuesday, January 19, 2010

Julie and Julia

I finally got around to watching the movie! I'm the type of person who prefers to read the book before seeing the movie. I finished the book back in November (you can find my brief review here) and I really wasn't impressed. I have to say though, I enjoyed the movie much more. I didn't find it as wonderful as some have made it out to be, but it was definitely a fun, relaxing movie.

But...I wouldn't be me if I didn't have a pet peeve. I can't remember how tall Julia Child was, but I know over six feet. Meryl Streep just isn't that tall and I could always tell when they had her standing on a stool in the kitchen. No, I couldn't see the stool, but her waist was in the wrong spot. The stool basically just lengthens a persons legs and makes the torso disproportionate. I know, the directors had no choice, but it's just something I noticed throughout the whole movie.

Monday, January 18, 2010

New Layout

For my google reader friends, just a heads up, I changed my blog template over the weekend. Nothing too exciting, I just got tired of the old one.

I'm also in need of recommendations. I've found multiple free templates, but a lot of them don't include the navbar at the top. I love my navbar--it's so easy to click new post. So, does anybody know any 3rd party sites that includes the navbar or a way to add it to the templates?

Sunday, January 17, 2010

Joe's Playoff Beard


Joe's fortunate enough to have the ability to grow a full beard. He's not one of those guys who grows a patch here and another there. I'm not really a facial hair type of chick, it hurts my face when he kisses me. Once the Ravens made it to the playoffs, hubsters decided to grow out his beard. They lost to the Colts last night, but he did grow it for two weeks. This is the longest he's gone without shaving. While I didn't like the scruffy feel of the beard when he kissed me, I kind of liked the look.

Egg Beaters

So I made scrambled eggs with egg beaters for the first time today. Honestly, I couldn't taste a difference. In fact, I might actually like them better than real eggs. Supposedly they're better for me, so perhaps I might be onto something. Either way, I'm glad I finally gave them a try!

Easy Vanilla Bean Ice Cream

No picture, y'all know what vanilla ice cream looks like :p

Lots of recipes call for egg yolks and looked a little too complicated for my first batch of ice cream, but then I came across a recipe by Alton Brown and it looked simple enough.

Hubsters prefers soft serve ice cream over hard serve, so we figured we would try it just after churning before it had time to harden in the freezer. Not the best idea. It was way too rich! Once it hardened overnight, it was almost divine.

I'm sure I'll make ice cream again, but overall, it's so much easier and cheaper to buy a carton from the store and tastes almost as good.

Recipe adapted from Alton Brown.

Ingredients

* 2 cups of half-and-half
* 1 cup of whipping cream
* 1 cup of sugar
* 1 vanilla bean, split and scraped

Directions

Combine all ingredients (including the bean and its pulp) in a large saucepan and place over medium heat. If you have one, attach a frying or candy thermometer to inside of pan. Stirring occasionally, bring the mixture to 170 degrees F. If you don't have a thermometer (which I don't), bring the mixture just barely to a simmer. As soon as you see a bubble hit the surface, remove it from the heat. Do not let it boil. Remove from heat and allow to cool slightly. Remove the hull of the vanilla bean, pour mixture into lidded container and refrigerate mixture overnight to mellow flavors and texture.

Freeze mixture in ice cream freezer according to unit's instructions. The mixture will not freeze hard in the machine. Once the volume has increased by 1/2 to 3/4 times, and reached a soft serve consistency, spoon the mixture back into a lidded container and harden in the freezer at least 1 hour before serving.

Saturday, January 16, 2010

Home Sweet Home

The time has come for hubsters and I to put our Omaha home on the market. It's for sale by owner, as that's how our community generally works. If you've ever been curious what our house looks like, you can check it out here. I figured since I took the time to make a blog of house pictures, I might as well share it.

Friday, January 15, 2010

Went to Mass Today

Every year my med school puts together a dinner for a physician to tell us about his or her "Calling to Medicine." Being a Catholic institution, there's an optional mass before the dinner.

I almost didn't go to the mass. The last time I went to mass I left the church feeling extremely angry. I skipped Christmas mass to avoid these feelings of anger and I didn't know if I was ready to go back today. Well lo and behold, I went and I feel a little better. It was a 30 minute mass in a conference room. The priest suggested we stay seated for the whole mass. I'm not going to lie, it felt awkward not standing and kneeling at the usual times. In fact, it made me miss this ritual.

I don't know where I am on my faith journey right now. I still don't know if the Catholic Church is the place for me, but I know I still continue to feel a void. I may give mass a try again this weekend, but I'm not sure. Perhaps, instead of going to church on Sundays I'll devote an hour to spiritual reading. I didn't do anything last weekend, so I guess I'll have to see how this weekend goes.

Either way, God Bless! (And please keep not only the people of Haiti in your prayers, but all individuals affected by natural disasters.)

Heart Wrenching and Ravens Related

If you haven't figured it out yet, hubby and I are from Baltimore. Hubsters is a huge Ravens fan and I definitely enjoy the fun too.

I'm a online message board and a friend posted this about who's been calling the first Ravens plays of the game. Definitely a heart wrenching story! I think it's also a great example of how little things can make a person's life so much happier.

Who's calling the Ravens plays?

Charting Menstrual Cycles

OK, I'll warn you ahead of time, this is probably TMI! So if you don't want to read an in depth reflection of my reproductive capabilities, I'd probably skip this post.

I'm an individual who believes that if you're not preventing a pregnancy through any form of contraception or natural family planning, you're "trying to conceive." Joe and I aren't quite ready to start trying to conceive. I'm starting residency in mid-June and that'll hopefully entail a move. I'll have a job, but since we're moving, Joe will have to find another job. So, given those factors, we've decided it's best to continue to keep preventing a pregnancy. (Now of course, if an "oops" happened I think we'd both be ecstatic, but we must be responsible here).

Coming this March, I'll have been on some form of hormonal birth control for nine years. Studies have shown that women on birth control for at least ten years have a decreased risk of ovarian cancer, but I digress. Having been on birth control for a large portion of my life, I'd like to see what my body is like off of it. Like any foreign substance we put into our bodies, it has side effects.

So with those thoughts above, I thought about starting to chart my cycle so I know when to avoid sex. Yes, lots of people give Natural Family Planning a bad rep, but done properly, it's very effective. Joe and I decided we'd not consider going off birth control just yet. But here's a problem I have with charting to avoid--I always imagined when Joe and decide it's time we'd like a baby, I'd just stop birth control. I wouldn't pay attention to when I'm ovulating, and just have sex when we'd want to have sex. (I told you this is a little TMI for some). This is where I'm running into a problem. If I start charting to avoid, that means we'd also know when it's most likely to conceive and when we're ready to have a baby, the "fun" would be gone. I don't really want to turn into the woman who says to her husband, "I'm ovulating today, so we better have sex," especially if the mood, timing, sleep status, etc aren't ideal for "baby making." (Don't get me wrong though, if after some time we aren't conceiving and we need to do this, I'll have to readjust my mind frame).

If you can't tell, I need to get back on a busy rotation so I can get babies of my brain!

That's originally $30!?!?

Earlier this week I was running some errands when I ran across a sign on Ulta's door - $5 hand treatment, originally $30. With it being winter, my hands are dry and while I wouldn't pay $30 for a hand treatment, I figured I could give it a try for $5. Oh my goodness! I don't even think it was worth $5! Ulta salons are dermalogica based, so it was those products, which are supposedly awesome. So first, the lady had me wash my hands. Afterward she put something on the tops of my hands, used a hot towel to rub it off. Then she put what I think should have been an exfoliant on the top of my hands again, but didn't rub the beady stuff in or anything. That sat for 1 minute. This is what I think the kicker is, she then put "hand repair" cream on my palms and told me to rub it in. Ummm...I have absolutely no problem rubbing lotion into my own hands, but if I was truly spending $30 on this treatment, I definitely expect you to be rubbing the lotion in!

So, overall I think my hands feel exactly the same and I would never get this treatment again (unless it was free, of course).

Sunday, January 10, 2010

Mushroom Bundles!

Yes, I know, this is not the best photo, oh well.

I absolutely love mushrooms, but hubsters is not a fan at all! I went to a surprise birthday party last night and figured it'd be a great opportunity to give these a try. I've never worked with phyllo before and man was it time consuming! From start to finish, one batch took 2 hours, but they sure were delicious!

Recipe adapted from Pioneer Woman who has a much better picture of the finished product along with great step by step photos!

INGREDIENTS

* 1 package (1 Roll) Phyllo Dough
* 1 stick Unsalted Butter
* 4 cups Chopped Mushrooms
* 4 cloves Garlic, Minced
* ½ cups Dry White Wine
* Salt To Taste
* ⅓ cups Grated Parmesan Cheese

DIRECTIONS

Melt 1/2 stick butter in a bowl. Set aside.

Melt 1/2 stick butter in a skillet over medium heat. Add garlic and mushrooms and cook for 1 minutes. Pour in wine, stir to mix, and cook for five minutes, or until all liquid is cooked off. Turn off heat and set aside.

Unroll phyllo dough. Cut stack in half. Working quickly, place 1 sheet on a flat surface and brush lightly with melted butter. Place another sheet on top and brush with butter. Repeat this until you have four to five sheets of phyllo. Do not brush top layer with butter.

Cut this buttered stack into four equal squares (rectangles). Place a spoonful of mushroom mixture in the middle of each square. Sprinkle Parmesan over the top of each mushroom.

Gather each square into a neat little bundle, pinching the neck so that it remains as closed as possible when it bakes. Place bundles on a greased or parchment-lined cookie sheet, pressing lightly so that they’re flat on the bottom.

Bake at 375 degrees for 15 minutes, or until golden brown. Serve immediately.

Vanilla Bean Cupcakes


Baking girl is back! Oh it feels so good to have some time to be back in the kitchen.

Joe loves anything vanilla and I've never worked with vanilla beans, so when I saw these cupcakes on Annie's Eats I figured I'd give them a try. I didn't plan ahead, so I had to buy the vanilla beans at the grocery store. Oh my goodness they are expensive! It was $8.50 for two beans! So, if you have any sites you know of with decently priced vanilla beans, please let me know!

This is also the first time I used a cake decorating tip to ice the cupcakes. I used Wilton's #21. Next time I need to use a bigger tip I think since I'd like the icing to look smoother.

I also gave Annie's icing a try. It was ok, but I prefer Wilton's butter cream recipe instead. I guess you can say I love my sugar!

Cost of vanilla beans aside, these cupcakes were quite delicious. Turns out I only needed to bake them 15 minutes. I ended up over baking one batch and they tasted dry, so be sure to check periodically.

Recipe From Annie's Eats who ultimately adapted it from The Well Decorated Cake

Ingredients:
3 cups cake flour
1 tbsp. baking powder
½ tsp. salt
1 vanilla bean, split lengthwise
16 tbsp. unsalted butter, at room temperature
2 cups sugar
5 large eggs, at room temperature
1¼ cups buttermilk, at room temperature
1 tbsp. vanilla extract

Directions:
Preheat the oven to 350° F. Line two cupcake pans with paper liners. Set aside.

In a medium mixing bowl, combine the cake flour, baking powder and salt. Whisk together and set aside. Add the butter to the bowl of an electric mixer fitted with the paddle attachment. Scrape the vanilla bean seeds into the bowl of the mixer with the butter and discard the pod (or reserve for another use.) Beat on medium-high speed for 3 minutes, until light and creamy in color. Scrape down the sides of the bowl and beat for one more minute.

Add the sugar to the butter mixture, ¼ cup at a time, beating 1 minute after each addition. Mix in the eggs one at a time until incorporated. Scrape down the sides of the bowl after each addition. Combine the buttermilk and the vanilla extract in a liquid measuring cup. With the mixer on low speed, add the dry ingredients alternately with the wet ingredients, beginning and ending with the dry ingredients and mixing just until incorporated. Scrape down the sides of the bowl and mix for 15 seconds longer.

Divide the batter between the prepared paper liners, filling each about 2/3 of the way full (you will likely have batter left over after filling 24 wells.) Bake 18-22 minutes, or until a toothpick inserted in the center comes out clean. Allow to cool in the pans 5-10 minutes, then transfer to a cooling rack to cool completely. Replace paper liners and bake remaining batter if desired. Frost cooled cupcakes as desired.

Yield: approximately 30 cupcakes

Saturday, January 9, 2010

TIMBER!

Tonight hubby and I went to a local college's ice hockey game. While there, I remembered a story about ice skating...

I know how to ice skate. Well, I can move forward in the rink's oval and almost not fall. When I was about 14, I went ice skating with a friend and ended up falling. By the time I was 14, I was my adult height of 5'10"--pretty tall to some of the other kids on the rink with us. Well as I fell, a ten-year-old or so yelled "TIMBER!" Thanks kid for pointing out the tall girl just fell on her butt.

Ok, it was funnier in my mind. Oh well.

Friday, January 8, 2010

Did you workout today, hunny?

Growing up I wasn't very athletic. Heck, I'll say it, I was the chubby book worm. I did soccer and softball on the side, but that was mostly just to hang out with my friends. After not making my high school's soccer team, I decided to give cross country a try. I'm so glad I did! Yes I think it helped screw up my knee, but it also taught me how wonderful it feels to workout on a regular basis.

While I'm no longer a runner (due to knee pain, but I'm hoping I can pick it back up this year), I still try to work out at least 3 times a week. The workouts are not nearly as intense as high school, but they still give me a sense of accomplishment. Plus, I love to eat my desserts. I figure if I work out, I can have my dessert. Pretty much enough motivation for me.

Now let's talk about Joe. I'm not going to lie, I'm a little afraid I'm going to be a widow by the time I'm 50 or 60. Both Joe's dad and Joe's paternal grandfather had heart disease before the age of 55--one died and the other required bypass surgery. While I know we can't help his genes, we can try to be active and eat well. Hubsters says he recognizes this, but his actions say otherwise. He's like a kid when it comes to eating his vegetables. He's not lazy, but he definitely prefers the couch if he's not working or if there is no snow to shovel. So yes, I worry about his health for selfish reasons, but I do really wish he ate a little better and worked out more. I didn't intend to do it, but so far everyday this year I've asked him, "Did you work out today?" Unfortunately other than when he shoveled snow last weekend, the answer has been no. I figure he'll eventually get annoyed and/or get the point, so I think I'm going to keep asking everyday. Sorry hunny :P

Oh! And yes, we've tried working out together. Sometimes it works, but mostly we need to work out on our own schedules.

One Photo Three Different Ways

One of the great things about digital photography and editing software is the ability to adjust photos in so many different ways.


I think this might be my favorite. I think it has a very Victorian feel.
Related Posts Plugin for WordPress, Blogger...